A Small Garden Sketchbook for One Afternoon
A small garden sketchbook turns one afternoon’s looking into useful notes on shape, texture and repeated forms, with a clear plan for the page.
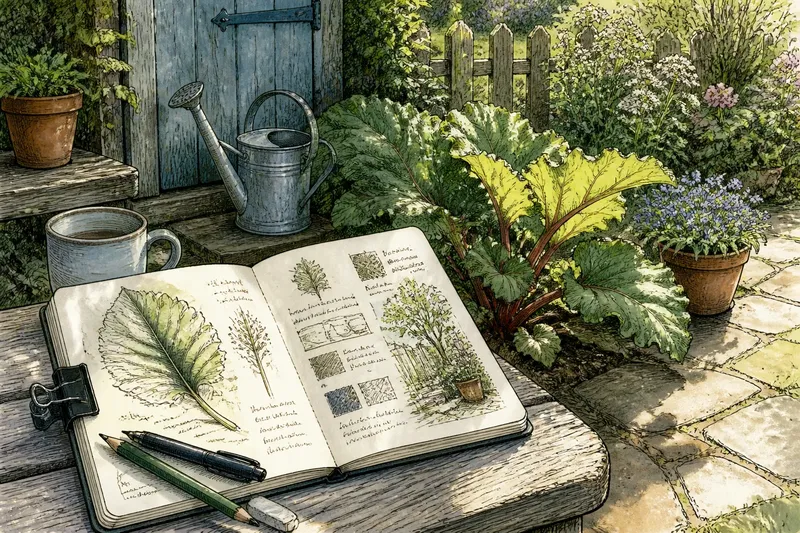
The bench is cool in the shade, a watering can leans beside the shed, and a patch of light picks out the ribs of a rhubarb leaf. A small garden sketchbook can hold these details without turning an afternoon’s walk into an art lesson. The aim is to notice how forms repeat, change and meet, then leave with a few clear marks that bring the garden back to mind.
Choose a familiar garden: a back garden, allotment, courtyard or planted edge of a village green. You are not trying to record every bed or identify every plant. Give the afternoon one modest subject and a way of looking that suits your energy, the weather and what catches your attention.
Three ways to look
There are three useful approaches: follow a single form, compare textures or collect repetitions. They can overlap, but keeping one in the foreground makes it easier to begin. Each produces a different kind of record, and none requires a polished picture.
Follow one form if your attention settles on a particular plant or object. A broad leaf, an arching stem, a seed head, a terracotta pot or the curve of a garden chair can provide enough material for a page. Draw the outer contour, then mark one or two internal lines that explain its shape.
Compare textures if the garden seems more interesting at close range than from across the lawn. Put a few small patches on the page, each standing for a surface: the creased face of a hosta leaf, fine grass, rough bark or gravel pressed into a path. These are shorthand, not botanical portraits. Changes in line weight or spacing can distinguish one surface from another.
Collect repetitions if your eye keeps moving between similar forms. A row of clipped balls, tilted pots, seed heads or fence posts can become a loose sequence of marks. This approach suits a busy or shared garden because it lets you notice an arrangement without needing to settle in one place for long.
To choose, ask what has held your gaze. If it is one silhouette, follow a form; if it is a tactile contrast, compare textures; if your eye keeps returning to a pattern, collect repetitions. Think of the page as a kitchen drawer organiser: separate compartments make small things easier to notice, but the contents need not become a finished display.
Garden sketchbook questions?
What should I bring?
A pocket sketchbook or a few sheets of paper, a pencil and a soft eraser are enough. Add a waterproof pen for firm lines or a small tin of watercolours if colour matters to your observation; leave behind anything that would make you reluctant to sit on a garden wall or damp grass.
How do I start a garden sketch?
Begin with a loose outline or a few marks for the direction of a stem, path edge or pot rim. Leave room around it, then add details that distinguish this subject: a notch, bend, cluster of veins or shadowed underside.
What if I cannot draw well?
Use symbols, short lines and notes rather than aiming for resemblance. “Three pale ribs”, “edges curl under” or a row of small loops can preserve what you noticed, even when the drawing is uncertain.
How should I use one afternoon?
Choose one main subject, make a close study, then step back to record its place in the garden. Finish with a brief note about location, light or weather; if your attention wanders, change the view instead of forcing more detail onto the page.
Pack for the garden
Keep the kit light enough to carry between a border, a shed and a sheltered seat. Check each item before setting out, then let the result guide what you bring:
- Check that the sketchbook opens flat; if it does, use it for drawing in place, but if it keeps closing, take a clip or use loose sheets on a firm board.
- Check that the pencil makes a clear line; if it does, use it for outlines and light shading, but if it is blunt, bring a sharpener or choose a softer pencil.
- Check that the eraser lifts a stray mark without scuffing the paper; if it does, keep it handy, but if it smears, leave the mark and clarify the shape with another line.
- Check whether a waterproof pen is useful for the subject; if you want crisp contours, pack one, but if you expect to revise outlines, stay with pencil.
- Check whether colour will help distinguish the view; if a flower or changing light is central, bring a small set of coloured pencils or watercolours, but if not, use a written colour note instead.
- Check the seat and surface before settling; if they are dry and stable, draw there, but if they are damp or uneven, stand at a safe, comfortable spot or find a sheltered place.
- Check the forecast and the garden’s exposure; if wind or rain may disturb paper, bring a clip and a protective folder, but if conditions are calm, keep the kit simple.
Make selective marks
A sketch becomes easier when you decide what not to include. A plant may have dozens of leaves, but you might draw only the one that catches the light, its supporting stem and the overlap behind it. That small choice gives the page a point of view without requiring a complete rendering.
Use the pencil lightly at first. Test the shape with a few short strokes, then strengthen the lines that seem important. If the outline drifts, keep the first attempt visible and add a second line rather than rubbing the page smooth; the adjustment records how your eye revised its guess.
Texture can be recorded through mark-making rather than shading every surface. Try parallel strokes for a narrow leaf, broken marks for rough bark, dots for gravel, or a blank gap where light falls across a dark mass. A brief note can clarify what the marks cannot, such as “glossy after watering” or “dry edges, centre still green”.
Colour is optional. If you bring coloured pencils or a small paintbox, choose a few colours that describe relationships: a cool green beside a warmer one, or muted earth tones against a bright flower. “Blue-green in shade” may be more useful than searching for an exact match.
Move between views
Drawing from close range reveals veins, edge damage and small changes in surface. Stepping back reveals the larger arrangement: where a plant leans, what it overlaps and whether its shape repeats elsewhere. Alternate between these distances rather than trying to fit both scales into one drawing.
For a close study, sit beside a pot or stand near a border and choose one feature. For a wider view, move far enough back to see the planting as a group, then sketch its broad masses as simple shapes. A margin note can connect the two: “silver leaves continue behind the blue pot”.
Light changes the drawing while you work. A sharp shadow may soften when a cloud passes; a leaf can turn and show its paler underside. Rather than correcting each change into one supposedly accurate view, add an arrow, a second outline or a note about the direction of light. The page then records an afternoon in motion.
One afternoon on paper
Say you settle beside an allotment bed with a pocket sketchbook, pencil and eraser. Three seed heads bend towards the path, and you have chosen to record both their repeated shape and their differences.
- Draw three light lines for the stems, leaving space between them; the page should show their shared direction without crowding.
- Add a loose outline for each seed head; if one is broader or more tilted, keep that variation rather than making the shapes identical.
- Mark a few short strokes on the heads to suggest their dry, bristly surfaces; if the marks make them too dark, leave more paper showing.
- Write “bending towards path” beside the stems and add a small arrow; the note should make the direction clear even if the lines are rough.
- Step back and look for a relation to the bed; if a fourth head stands apart, draw it in a separate small cluster rather than squeezing it into the first group.
- Add “east end of allotment bed, beside rain barrel” and a weather note if useful; the location should help you recognise the view on a later visit.
The result is a page that records repeated forms, their differences and where they stood. It is not meant to resemble a finished illustration; it should make the afternoon’s particular view easy to recall.
Leave room to return
Resist the urge to tidy every mark before closing the book. A half-drawn pot rim or patch of uncertain hatching is not a defect if it reminds you where your attention went. Add the date if useful and leave a strip of blank paper for a later observation.
A small garden sketchbook works best when it stays available for imperfect, specific looking. Keep it by the back door, in an allotment bag or beside the chair where you sit outdoors. On another visit, the page may help you notice a curve now hidden by foliage, a surface softened by rain or a form that has altered while the garden kept growing.